
Updated 2014/11/21 : Fixed a bug when deploying (thanks @meyer_baptiste). Added a command to update GitHub commit status (thanks @samuelroze).
At Les-Tilleuls.coop, we built great e-commerce platforms and high-performance web applications with quality and agility in mind.
Most of our applications share the same technical stack:
- the PHP language with the Symfony framework and Doctrine for back applications
- front applications developed with CoffeeScript or JavaScript, AngularJS and Twitter Bootstrap (Grunt as build system, Yeoman for scaffolding, Karma and Jasmine for tests)
- private Git repositories (hosted on GitHub)
- private libraries and bundles shared between applications and exposed as Composer packages
- phpspec unit tests
- Doctrine Data Fixtures (enhanced with Alice and Faker)
- Behat scenarios
- exhaustive PHPDoc
- capifony scripts for deployment
I managed to build a pretty cool CI system allowing us to deliver high quality Symfony applications. In this tutorial, you’ll see how it looks and how to install it step by step. If you aren’t using a CI system, it will increase drastically the quality of your Symfony projects and over the time, it will increase your team your development skills.
Our CI system mostly relies on Jenkins. At every commit (on every branch) it:
- updates our private Composer package repository index
- runs all tests and scenarios, including web acceptance test trough headless and real browsers
- runs a bunch of quality checks on the code: security issues, dead code and code duplication detection, cyclomatic complexity analysis, good structuration and following of Symfony’s best practices
- checks Coding Standards conformance
- generates a browsable API documentation
- instantly deploys the new version of the application on testing and sometimes even production servers (continuous deployment)
Finished feature branches are reviewed and merged in the master branch through GitHub Pull Requests by a lead dev only when all tests and checks are green.
The following tutorial can be followed on Debian (wheezy) and Ubuntu.
Installing Jenkins
The Jenkins team maintains a Debian repository providing up to date binary packages. Add it to your CI box and install the package (as root):
# wget -q -O - http://pkg.jenkins-ci.org/debian/jenkins-ci.org.key | apt-key add -
# echo "deb http://pkg.jenkins-ci.org/debian binary/" >> /etc/apt/sources.list
# apt-get update
# apt-get install jenkins
If nothing goes wrong, the Jenkins UI is now available on the port 8080 of your CI box. Open the UI in your favorite web browser. So easy.
Securing the installation
Currently, anyone knowing the URL of your Jenkins install can take the control over it. It’s a good idea to set credentials required to access the CI:
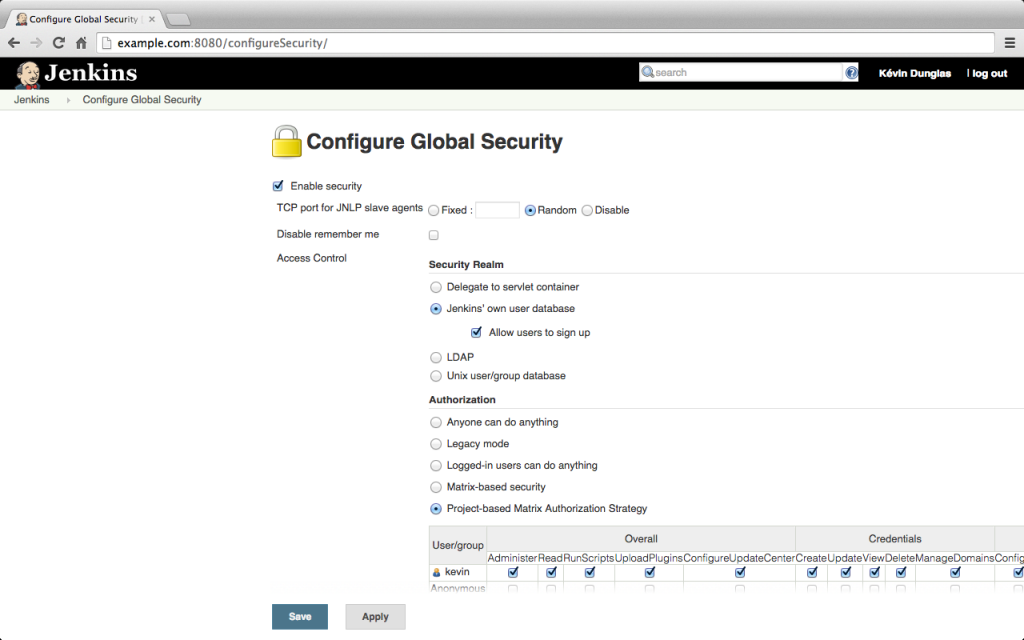
- go to “Manage Jenkins” then “Setup Security”
- check “Enable security”
- in the “Security Realm” section, select your user provider (“Jenkins’ own user database” is a good default if you don’t have a LDAP directory or any other centralized user provider for your organization)
- don’t forget checking “Allow users to sign up”, it’s mandatory to be able to log in after enabling the security
- in the “Authorization” section, choose “Project-based Matrix Authorization Strategy”, leave all checkboxes for “anonymous” empty and create a super admin user having all rights
- enable CSRF protection by checking “Prevent Cross Site Request Forgery exploits”
- save and go back to the homepage
- you’re prompted to authenticate, click “Sign up” and create an account with the same username you given administration rights earlier
Jenkins is now secured! Go back to security settings to disable the signup form.
Connecting Jenkins with GitHub repositories
Jenkins must be able to pull data from your privates GitHub repository. The best way I found is to create a GitHub machine user with a read-only access to private repositories. You can add users with write access to your repositories from GitHub by clicking “Settings” then “Collaborators” (the write permission is necessary to update the build status on GitHub. If you don’t care about this feature, just set a read only access to the repo).
Now, we’ll create private and public SSH keys for the UNIX account running Jenkins (on Debian it is called jenkins):
# su jenkins # Switch to the jenkins user
$ ssh-keygen -t rsa # Generate SSH keys
The last step is adding the public key to the GitHub account of the machine user. From GitHub’s homepage, logged in as your machine user account, go to “Settings” then “SSH Keys”. Add a new key with the content of /var/lib/jenkins/.ssh/id_rsa.pub.
Jenkins is now able to connect to our GitHub repositories.
To update the GitHub commit status, our machine user will also need an access token to the GitHub API. Go to the settings page of the user, click on “Applications” then click on “Generate new token” and be sure to check the “repo:status” permission. Save the token, we’ll use it our build script.
Installing PHP
The PHP interpreter is needed to run our projects tests and other tools such as Composer and Satis. Install it:
apt-get install php5-cli php5-apc php5-sqlite
You noticed that I also installed APC to speed up script execution. I’ve also installed SQLite. I use it as DBMS for the test environment of Symfony applications.
Installing Satis
Satis is the most popular (and the only open source) private Composer package repository. This tool generates a static Composer index. Later, we will add a task in Jenkins to rebuild the repository at each commits. It will allow us to have an always up to date Composer Package Repository. To do that, we must install Satis and make the jenkins user must able to run it.
Satis must be installed through Composer. Switch to the jenkins user and start by installing Composer, then Satis:
# su jenkins
$ cd ~
$ curl -sS https://getcomposer.org/installer | php
$ php composer.phar create-project composer/satis --stability=dev
Then, create a config file for Satis called packages.json:
{
    "name": "Your repository name",
    "homepage": "http://packages.example.com/",
    "repositories": [
        { "type": "vcs", "url": "[email protected]:coopTilleuls/repo1.git" },
        { "type": "vcs", "url": "[email protected]:coopTilleuls/repo2.git" }
    ],
    "require-all": true
}
This config file will enable 2 privates Composer packages (repo1 and repo2 ). Thanks to the SSH keys we configured later, the jenkins user is able to connect to our privates GitHub repositories. Of course those repositories must have a composer.json file at their root. Full configuration options of Satis is documented on the Composer website.
Generate the package repository manually for the first time:
satis/bin/satis –no-interaction build /var/www/packages.json packages
The next and step is exposing our packages over HTTP. We will use nginx to do it. Switch back to the root user (Ctrl + d) and type:
# apt-get install nginx
Then change the content of /etc/nginx/sites-enabled/default by the following:
server {
        root /var/lib/jenkins/packages;
        index index.html;

        location / {
                try_files $uri $uri/ /index.html;
                allow <my-ip>;
                deny all;
        }
}
Don’t forget to replace <my-ip> by the list of IPs allowed to access the package repository. It will prevent exposing your private repository on the whole internet.
Restart nginx:
# /etc/init.d/nginx restart
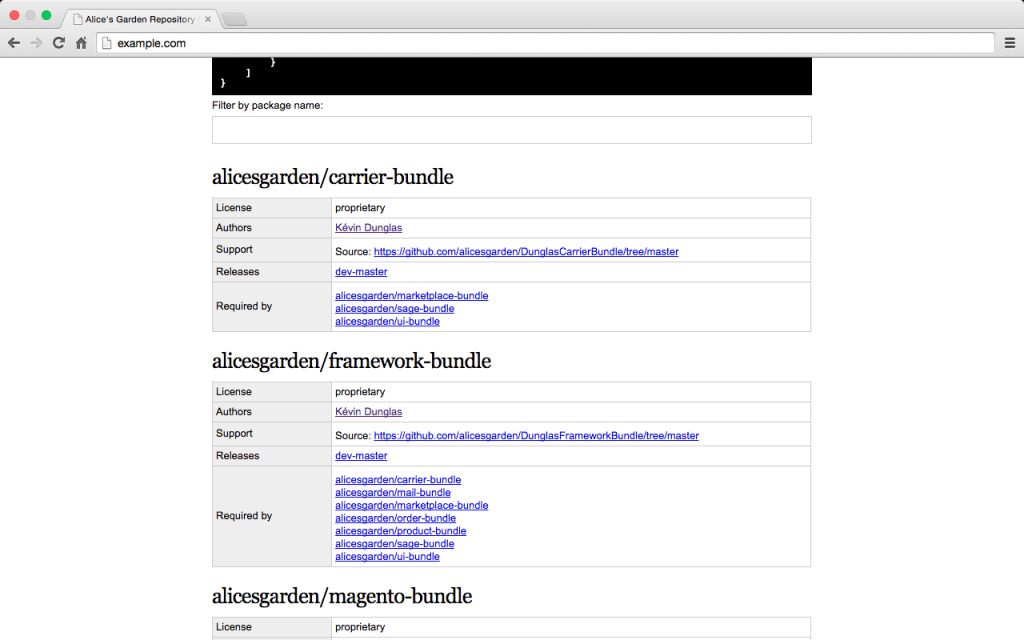
We should be able to browse the repository through our favorite web browser.
Enabling Git and GitHub support
Git and GitHub support are available through plugins. Go to “Manage Jenkins” then “Manage Plugins” and install plugins called “Git Plugin” and “GitHub Plugin”. Their names should be explicit.
Then, we will setup a GitHub Webhook to trigger a build every time a commit is pushed, in any branch.
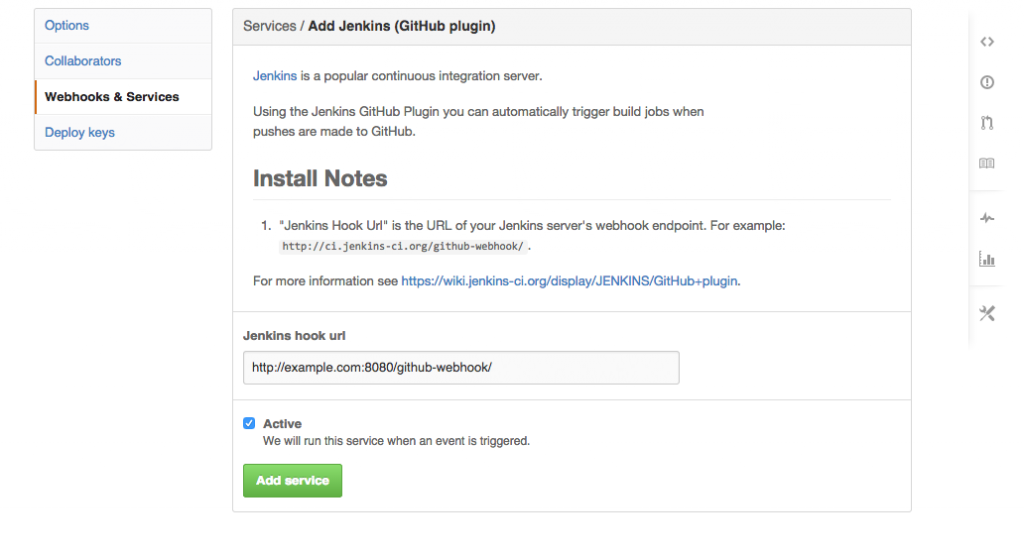
Go to your GitHub repository, click on “Settings” then “Webhooks & Services”. Click on the “Add service” select box and choose “Jenkins (GitHub plugin)”. Enter your Jenkins’ webhook endpoint in the box, it should be something like http://ci.les-tilleuls.coop:8080/github-webhook/ (just replace the domain part of the URL) and click “Add service”.
The webook is set! Jenkins will be notified every time we push something our GitHub repo. Repeat this step for every GitHub repository you want to trigger builds.
Installing PHP CS Fixer
PHP CS Fixer is an awesome tool provided by SensioLabs. It’s 1.0 version has just been released. It automatically fixes PSR-0, PSR-1, PSR-2 and Symfony coding standard violations.
With its –dry-run option, it can be used in our CI to check if the produced code is clean.
PHP CS Fixer is packaged as a PHAR archive. Lets install it:
# su jenkins # Switch to the jenkins user
$ cd # Change to the home directory of the jenkins user
$ wget http://get.sensiolabs.org/php-cs-fixer.phar # Download PHP CS Fixer
Installing phpDocumentator
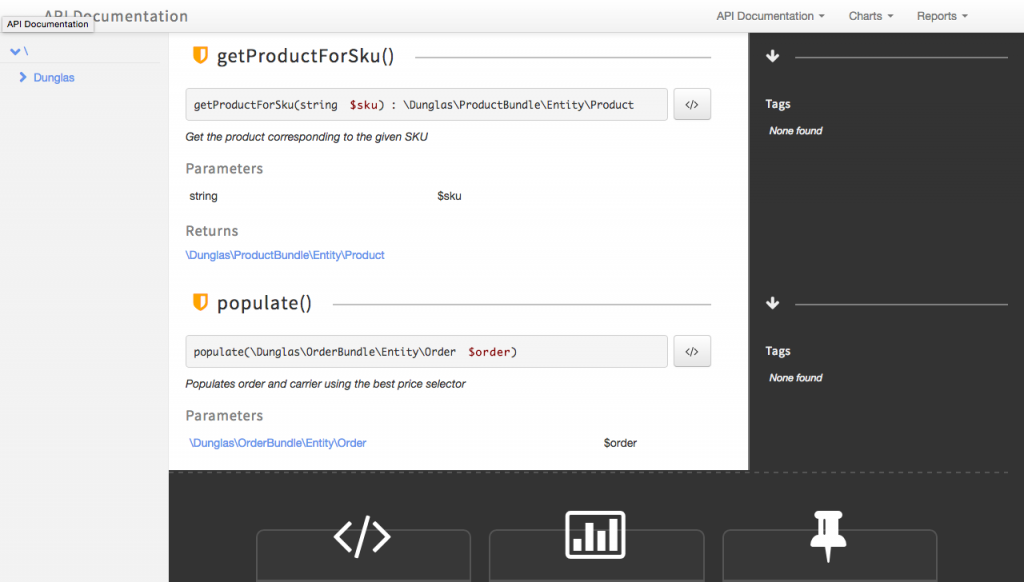
phpDocumentator generates a beautiful HTML documentation based on DocBlocks documenting your classes and methods.
As for PHP CS Fixer, we will install its PHAR version, but before downloading it, we need to install some extra Debian packages:
# apt-get install graphviz php5-intl # phpDocumentator dependencies
# su jenkins
$ cd
$ wget http://phpdoc.org/phpDocumentor.phar
Web Acceptance Testing with Behat and PhantomJS
We love Behat and Mink. We use them to manage our user stories and to run automated web testing scenarios.
Standards Symfony controllers are tested with the Symfony2 extension. But nowadays, we create more and more Single Page Applications usually composed of a Symfony 2 backed JSON / REST API and an AngularJS client.
It sounds like a good idea to also test interactions between AngularJS clients and Symfony REST API in the CI system. Behat and Mink will help.
I usually use Mink Selenium2 to drive PhantomJS, an awesome headless browser based on Webkit. Unlike the Symfony2 extension, the PhantomJS needs to access the application trough a public URL. We need a front controller exposing the test environment. Lets write it. We will also configure the built-in web server provided by Symfony to avoid configuring a heavier solution like nginx + PHP FPM.
The first step is to create a new front controller for the test environment (Symfony comes with front controllers for prod and dev environments but not for test ).
Create a new front controller called app_test.php in the web/ directory your application. It should contain something like the following:
<?php

// Adapted from https://github.com/symfony/symfony-standard/blob/master/web/app_dev.php

use Symfony\Component\HttpFoundation\Request;
use Symfony\Component\Debug\Debug;

if (isset($_SERVER['HTTP_CLIENT_IP'])
    || isset($_SERVER['HTTP_X_FORWARDED_FOR'])
    || !(in_array(@$_SERVER['REMOTE_ADDR'], array('127.0.0.1', 'fe80::1', '::1')) || php_sapi_name() === 'cli-server')
) {
    header('HTTP/1.0 403 Forbidden');
    exit('You are not allowed to access this file. Check '.basename(__FILE__).' for more information.');
}
$loader = require_once __DIR__.'/../app/bootstrap.php.cache';
Debug::enable();
require_once __DIR__.'/../app/AppKernel.php';
$kernel = new AppKernel('test', true);
$kernel->loadClassCache();
$request = Request::createFromGlobals();
$response = $kernel->handle($request);
$response->send();
$kernel->terminate($request, $response);
We also need a custom router for the built-in web server. It will allow to use the test env. Create a file in the app/config/ directory of your application called router_test.php . Here is the sample code:
<?php

// Adapted from https://github.com/symfony/symfony/blob/master/src/Symfony/Bundle/FrameworkBundle/Resources/config/router_prod.php

if (is_file($_SERVER['DOCUMENT_ROOT'].DIRECTORY_SEPARATOR.$_SERVER['SCRIPT_NAME'])) {
    return false;
}

$_SERVER = array_merge($_SERVER, $_ENV);
$_SERVER['SCRIPT_FILENAME'] = $_SERVER['DOCUMENT_ROOT'].DIRECTORY_SEPARATOR.'app_test.php';

require 'app_test.php';
The next step is to install PhantomJS. The PhantomJS package is not available in Debian stable. We will fallback to the binary version provided on the official website:
# su jenkins
$ cd
$ wget https://bitbucket.org/ariya/phantomjs/downloads/phantomjs-1.9.8-linux-x86_64.tar.bz2
$ tar xvjpf phantomjs-1.9.8-linux-x86_64.tar.bz2
The behat.yml file of your project must be changed to specify the base URL and the Selenium2’s WebDriver host to use. Here is a sample file:
default:
    extensions:
        Behat\MinkExtension:
            base_url: "http://127.0.0.1:8000"
            selenium2:
                wd_host: "http://127.0.0.1:8787/wd/hub"
You are ready to write scenarios testing the whole app. They will be executed at each commit! To test consistency across browsers and platforms (mobile devices, exotic systems…), you can take a look to SauceLabs. This SaaS platform is well integrated with Behat and can be a good (but more expensive) replacement to PhantomJS!
Checking code quality with SensioLabs Insight
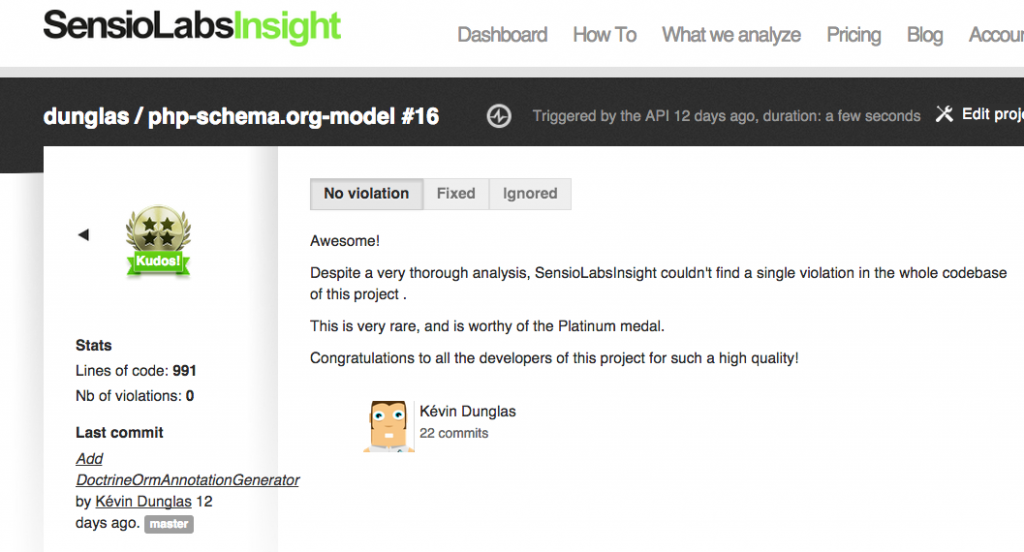
SensioLabs published earlier this year a SaaS platform running quality analysis for PHP and especially Symfony projects. That service is called Insight. It’s user friendly, cool to play with (it provides some gamification with a system of “medals”) and finds a lot of bad practices in bundles and Symfony applications.
The first step is to create an account and register your project on the Insight website. Configure your credentials, set the Git repository to analyse and run manually a first analysis. You will probably find some problems in your app that must be fixed!
SensioLabs Insight provides a tool allowing to run new analysis in a CI system. Like other tools we already installed, the insight command is available as a PHAR. Download it as the jenkins user:
# su jenkins
$ cd
$ wget http://get.insight.sensiolabs.com/insight.phar
Find the uuid of the project you want to analyse with the following command:
$ php insight.phar projects
The first time you’ll use insight.phar, you’ll be prompted for your user id and API token. You can find them in your SensioLabs Insight account page (“API/SDK” tab). Your credentials will be saved by insight.phar.
We are now able to integrate SensioLabs Insight in the Jenkins script. Write the uuid of your project somewhere, we will need it later.
Insight can output violations in the PMD format. You guessed it, Jenkins has a PMD plugin able to display nicely that sort of output.
Go to “Manage Jenkins”, “Plugin Manager”, click on the “Available” tabs and search for “PMD plugin”. Install it.
SensioLabs Insight is free for public open source projects but a subscription is needed to analyse private projects. I think it’s a good investment but I can’t blame you if you prefer using open source softwares. Sebastian Bergmann (the author of phpunit) maintains a great documentation explaining how to set up open source quality checking tools including PHPMD, phploc, PHP_Depend and phpcpd. Fell free to complete your installation with jenkins-php.org.
Note: at the time I write these lines there is some issues with the PMD output and the fail-condition option of the insight command. I’ve submitted fixes to them and I hope they will be integrated soon in the PHAR file.
Continuous Deployment with Capifony
It’s always good to have a testing server running the last version of the project. Sometimes, we go one step beyond and we let Jenkins pushing stable code in production thanks to Git’s tags (not detailed here).
Anyway, I use a tool you probably already know: capifony. It’s a deployment software specialized for Symfony projects built on top of Capistrano. It’s the easy way to deploy your application. It handle copying the source code to the server using Git, setting correct directory permissions, installing project’s dependencies, running database migration scripts, restarting services such as PHP FPM and many more. If you don’t already use it, give it a try, you will love it.
Like most Ruby applications, capifony is available as a gem. There is nothing easier than installing it on Debian:
# apt-get install rubygems
# gem install capifony
Creating the Jenkins project
Go back to the Jenkins Dashboard and click on the “create new jobs” button. On the next screen give a name to your project and choose “Freestyle project”.
On the next screen:
- fill the “GitHub project” input with the base URL of your GitHub repository
In the “Source Code Management” section:
- select “Git” as “Source Code Management”
- in “Repository URL”, enter the SSH clone URL of your Git repository (it must be like [email protected]:coopTilleuls/myrepo.git )
- click the “Add” button below “Credentials”
- choose “SSH Username with private key” as “Kind”
- choose “From a file on Jenkins master” for “Private Key” and click “Add” (It allows to use SSH keys we created and added to GitHub in the previous step)
- set “Branches to build” to empty (to build all branches of the repository)
- select “githubweb” as “Repository browser” and enter the URL of your repo’s homepage again
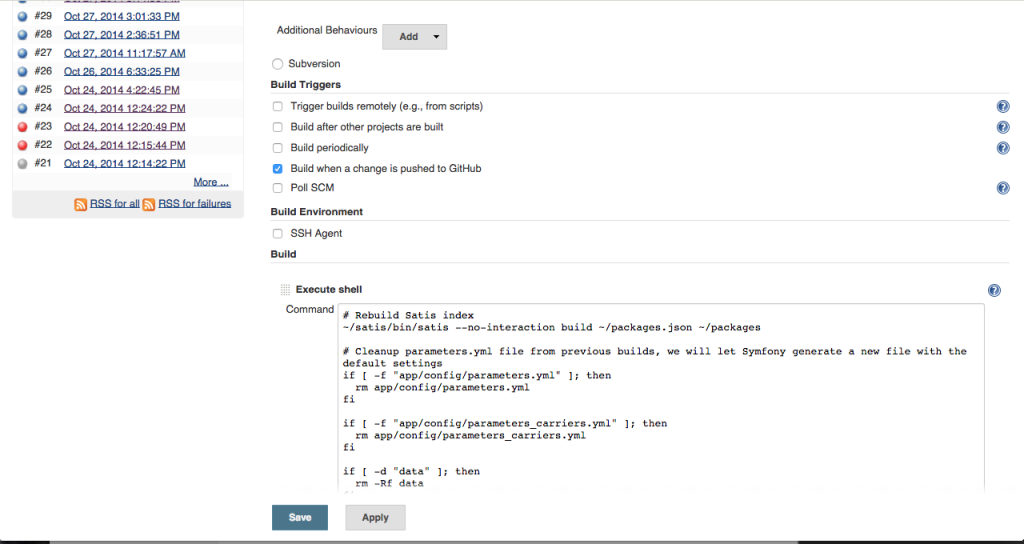
In “Build triggers”:
- check “Build when a change is pushed to GitHub”
In “Build”:
Add a new “Execute shell” build step and use the following script as a template to fit your own needs:
ghRepo=myOrg/myRepo
ghAccessToken=MyGitHubAccessToken
insightProject=my-sensiolabs-insight-project-uuid

echo '{"state":"pending", "target_url": "'$BUILD_URL'", "description": "Build in progress..."}' | curl --header "Content-Type: application/json" -d @- https://api.github.com/repos/$ghRepo/statuses/$GIT_COMMIT?access_token=$ghAccessToken

# Rebuild Satis index
~/satis/bin/satis --no-interaction build ~/packages.json ~/packages

# Cleanup parameters.yml file from previous builds, we will let Symfony generate a new file with the default settings
if [ -f "app/config/parameters.yml" ]; then
  rm app/config/parameters.yml
fi

# Cleanup cache from previous builds
if [ -d "app/cache" ]; then
  rm -Rf app/cache/*
fi

# Create a build directory if necessary
mkdir -p build

# To collect commands statutes
status=0

# Analyze with SL Insight
php ~/insight.phar analyze $insightProject
# Check the result if the result is a platinum medal (all is good)
# Fail conditions are customizable, see http://blog.insight.sensiolabs.com/2014/02/12/jenkins-integration.html
php ~/insight.phar analysis $insightProject --format="pmd" --fail-condition="analysis.getGrade() != 'platinum'" > build/pmd.xml || status=$((status+$?))

# Check CS
php ~/php-cs-fixer.phar fix --no-interaction --dry-run --diff -vvv src/ || status=$((status+$?))

# Generate PHPDoc
php ~/phpDocumentor.phar -d src -t build/doc || status=$((status+$?))

# Install dependencies through Composer
php ~/composer.phar install --no-interaction --dev || status=$((status+$?))

# Create the database (I mostly use a SQLite database stored in the cache/ directory of the app)
php app/console -e=test doctrine:schema:create || status=$((status+$?))

# Load fixtures
php app/console -e=test doctrine:fixtures:load || status=$((status+$?))

# Run unit tests through phpspec and store the result in the JUnit format, we will use it later
bin/phpspec run --format junit > build/unit.xml || status=$((status+$?))

# If you use phpunit instead of phpspec, comment the previous and uncomment the following line
#./bin/phpunit --log-junit build/unit.xml || status=$((status+$?))

# Run PHP built-in web server
# Use the dev router because no test router is provided by default
php app/console server:run -e=test --router=app/config/router_test.php &

# Store the PID of the process in a variable
serverPID=$!

# Run PhantomJS in WebDriver mode (Selenium2)
~/phantomjs-1.9.8-linux-x86_64/bin/phantomjs --webdriver=8787 &

# Store the PID again
phantomPID=$!

# Wait for HTTP server and PhantomJS initialization
sleep 30

# Run Behat scenarios
# The result is send to the console because the jUnit formatter is not ready yet for Behat 3.0 (https://github.com/Behat/Behat/issues/358)
bin/behat || status=$((status+$?))

# Stop the HTTP server and PhantomJS
kill -9 $serverPID
kill -9 $phantomPID

if [ $status -eq 0 ]; then
    # Update the commit status on success
    echo '{"state":"success", "target_url": "'$BUILD_URL'", "description": "The build succeeded!"}' | curl --header "Content-Type: application/json" -d @- https://api.github.com/repos/$ghRepo/statuses/$GIT_COMMIT?access_token=$ghAccessToken

    # Continuous deployment
    cap deploy
else
    # Update commit status on failure
    echo '{"state":"failure", "target_url": "'$BUILD_URL'", "description": "The build failed."}' | curl --header "Content-Type: application/json" -d @- https://api.github.com/repos/$ghRepo/statuses/$GIT_COMMIT?access_token=$ghAccessToken
fi

# Return build status
exit $status
Basically, the script run the various tools we installed earlier and don’t stop when an error occurs. Instead, it collect the return status of commands, and returns at the end of the script if the build is successful or not. It allows to always run all checks, even if one fail. The deployment (if enabled) only occurs if the build is successful. The built-in web server and PhantomJS run in background to allow them working simultaneously with Behat. They are killed after Behat exited.
Don’t fortget to customize value of variables in the top of the script.
Why not a XML file? Because I sometimes use other build servers such as Travis CI and Bamboo. Using a simple shell script allows to easily replace Jenkins with another server. Shell scripts can also be versioned directly in the Git repository.
In “Post-build Actions”:
- Add the “Set build status on GitHub commit” step
- Add “Publish JUnit test result report” and specify build/unit.xml for “Test report XMLs”
- Add “Publish PMD analysis results” and specify build/pmd.xml for “PMD results”
- Add “Publish Javadoc” and set build/doc as “Javadoc directory”
- Add other actions you’re interested in (like sending mails)
Troubleshooting GitHub API rate errors
If your start getting errors like “Could not fetch https://api.github.com/[…], enter your GitHub credentials to go over the API rate limit” in the console output, it’s because you exceed GitHub API rates for anonymous users. Just open a shell, switch to the Jenkins user, download something with Composer and enter your machine user credentials when prompted:
# su jenkins
$ php composer.phar create-project dunglas/php-schema.org-model
Username: my-machine-user
Password: my-password
Because Composer stocks an OAuth in .composer/auth.json , all next calls to GitHub will succeed, even when launched by Jenkins.
Troubleshooting mails
To make Jenkins able to send mails (when a build fails for instance), you need to configure a SMTP server. The easier way is to install a local server on your CI server:
# apt-get install postfix
Default options should be OK.
To customize mail parameters, from the Jenkins homepage go to “Manage Jenkins” then “Configure System”. SMTP settings are under the “E-mail notification” section and the address used by Jenkins to send mails in “Jenkins Location”.
Updating automatically the localy installed tools
As any software, all tools used by our CI server get updates fixing bugs and adding new features. Debian and Jenkins can be updated using apt. Jenkins plugins updates are managed directly trough the Jenkins user interface. But software we installed locally must be updated “by hand”. We will periodically run a small shell script I’ve written to update those tools.
Create the following update-tools.sh script as the jenkins user in its home directory (~jenkins):
#!/bin/sh
php composer.phar self-update
php php-cs-fixer.phar self-update
# The self-update option of phpDocumentator is broken at time of writing
wget -q http://phpdoc.org/phpDocumentor.phar -O phpDocumentor.phar
cd satis/
php ../composer.phar update --no-interaction
Don’t forget to make it executable by executing chmod +x update-tools.sh. To get the updates every night, run crontab -e and add the following line:
00 00 * * * ~/update-tools.sh
You’re CI system is now ready. Your full test suit and quality analysis are running against new produced code in realtime! We also have quality checking and tests specifics for our frontend apps. Maybe If people are interested about that, maybe I’ll write another post detailing our infrastructure.
I’m sure you have your own preferred quality tools and CI best practices for Symfony projects. Share them with us in the comments 🙂
Thank you for your post!